
Blog
Create Dashboard Widget in WordPress | WP-AI-Assistant.app #wordpress #ai #automation
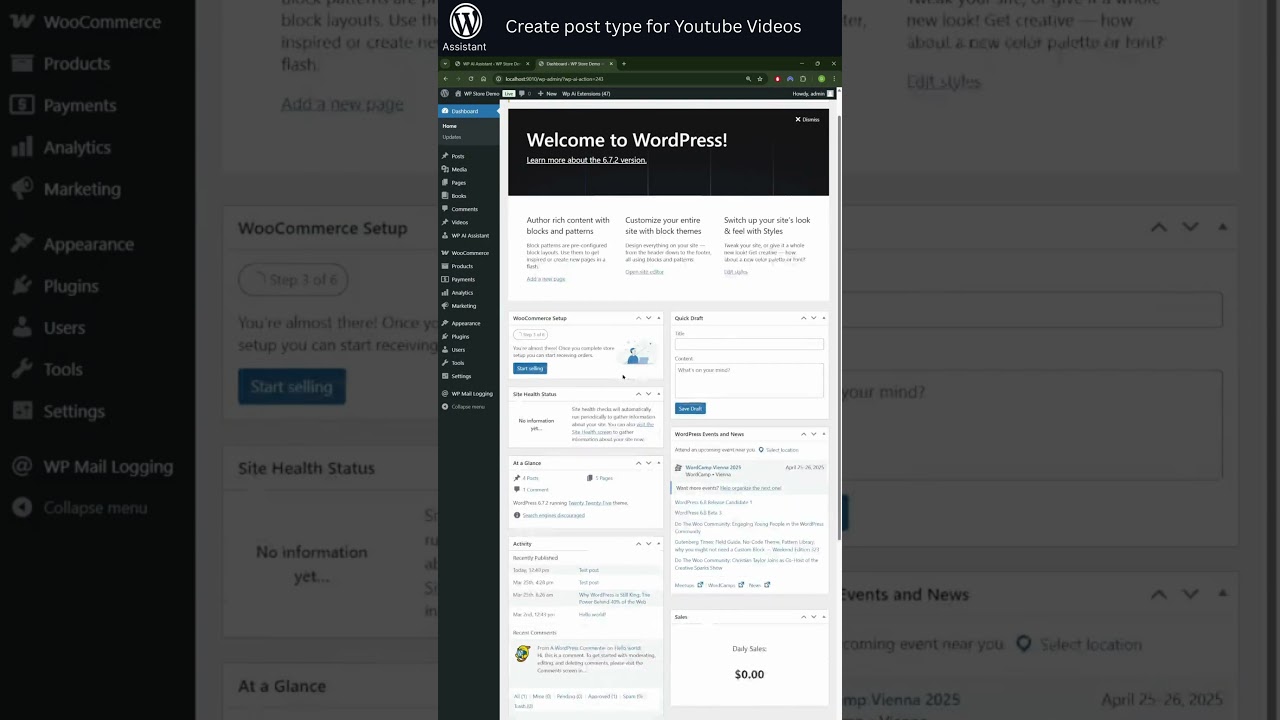
Creating custom dashboard widgets within the WordPress admin area is a powerful method to enhance user experience, streamline workflows, and present vital information at a glance. While the platform offers default widgets like "At a Glance" and "Activity," the true potential is unlocked when you design a widget tailored to your specific needs or those of your clients.
This guide will walk you through the entire process, from understanding the core code to implementing a functional and aesthetically pleasing dashboard widget. Whether you aim to display real-time analytics, quick post statistics, or custom reminders, mastering this skill will significantly elevate your WordPress development capabilities.
Understanding the WordPress Dashboard Structure
Before writing a single line of code, it’s crucial to understand what you’re modifying. The WordPress admin dashboard is built using a series of meta boxes, which are containers for content and functionality. These meta boxes can be dragged, dropped, toggled, and closed by users, offering a flexible interface.
When you create a new dashboard widget, you are essentially registering a new meta box and defining its content. This process is handled through WordPress’s robust hooks system, specifically the wp_dashboard_setup hook, which is fired when the dashboard is being prepared for display.
This approach ensures your code integrates seamlessly with the core WordPress environment, maintaining compatibility and adhering to best practices.
The Core Code: Building Your First Widget
The foundation of creating a custom dashboard widget lies within your theme’s functions.php file or, more appropriately, within a custom plugin. Using a plugin is the recommended approach as it ensures the functionality remains independent of your theme, preventing loss upon theme switching.
Here is the basic code structure to add a simple widget:
php
function my_custom_dashboard_widget() {
wp_add_dashboard_widget(
‘my_awesome_widget’, // Widget slug/ID
‘My Awesome Widget’, // Widget title
‘my_widget_display_function’ // Display function
);
}
add_action( ‘wp_dashboard_setup’, ‘my_custom_dashboard_widget’ );
function my_widget_display_function() {
echo ‘
This is my first custom dashboard widget. The possibilities are endless!
‘;
}
Let’s break down the wp_add_dashboard_widget() function:
- Widget Slug/ID (
'my_awesome_widget'): This is a unique identifier for your widget. It should be written in lowercase with underscores and no spaces. - Widget Title (
'My Awesome Widget'): This is the text that will appear in the title bar of your widget box. - Display Function (
'my_widget_display_function'): This is the name of the function you create that contains all the HTML and logic to output the widget’s content.
After placing this code in your functions.php file or plugin and visiting your dashboard, you should see your new widget among the others. You can reposition it via drag-and-drop like any other widget.
Enhancing Functionality: Configuration and Data Display
A simple text widget is a good start, but the real utility comes from displaying dynamic data. You can pull information from your database, call external APIs, or create a configurable widget.
Let’s create a more practical example: a widget that displays the total number of published posts, pages, and a list of the most recent comments.
php
function my_statistics_dashboard_widget() {
wp_add_dashboard_widget(
‘website_statistics_widget’,
‘Website Statistics’,
‘display_statistics_widget’
);
}
add_action( ‘wp_dashboard_setup’, ‘my_statistics_dashboard_widget’ );
function display_statistics_widget() {
// Get post count
$post_count = wp_count_posts(‘post’)->publish;
// Get page count
$page_count = wp_count_posts(‘page’)->publish;
// Get recent comments
$recent_comments = get_comments( array( ‘number’ => 5, ‘status’ => ‘approve’ ) );
echo '<div class="my-dashboard-widget">';
echo '<h4>Content Overview:</h4>';
echo '<ul>';
echo '<li><strong>Published Posts:</strong> ' . $post_count . '</li>';
echo '<li><strong>Published Pages:</strong> ' . $page_count . '</li>';
echo '</ul>';

if ( ! empty( $recent_comments ) ) {
    echo '<h4>Recent Comments:</h4>';
    echo '<ul>';
    foreach ( $recent_comments as $comment ) {
        echo '<li>' . get_avatar( $comment->comment_author_email, 32 ) . ' ';
        echo '<strong>' . $comment->comment_author . '</strong> on <a href="' . get_comment_link( $comment ) . '">' . get_the_title( $comment->comment_post_ID ) . '</a></li>';
    }
    echo '</ul>';
}
echo '</div>';
}
This code demonstrates how to use core WordPress functions like wp_count_posts() and get_comments() to fetch meaningful data and present it clearly to the user.
Adding Configuration Capabilities
For widgets that require user input, such as an API key or a preference setting, you can add a configuration callback. This allows users to customize the widget’s behavior by clicking the "Configure" link in its title bar.
Here’s how to implement a configurable widget:
php
function my_configurable_widget() {
wp_add_dashboard_widget(
‘configurable_example_widget’,
‘Configurable Widget’,
‘display_configurable_widget’,
‘configure_example_widget’
);
}
add_action( ‘wp_dashboard_setup’, ‘my_configurable_widget’ );
// Display function
function display_configurable_widget() {
$options = get_option( ‘my_dashboard_widget_options’ );
$message = ( ! empty( $options[‘custom_message’] ) ) ? $options[‘custom_message’] : ‘No custom message set.’;
echo ‘
Your message: ‘ . $message . ‘
‘;
}
// Configuration function
function configure_example_widget() {
$options = get_option( ‘my_dashboard_widget_options’ );
if ( isset( $_POST[‘my_dashboard_widget_nonce’] ) && wp_verify_nonce( $_POST[‘my_dashboard_widget_nonce’], ‘save_configuration’ ) ) {
if ( isset( $_POST[‘custom_message’] ) ) {
$options[‘custom_message’] = sanitize_text_field( $_POST[‘custom_message’] );
update_option( ‘my_dashboard_widget_options’, $options );
}
}
?>
<input type="text" id="custom_message" name="custom_message" value="<?php echo isset( $options['custom_message'] ) ? $options['custom_message'] : ''; ?>" />
<?php wp_nonce_field( 'save_configuration', 'my_dashboard_widget_nonce' ); ?>
<?php
}
In this example, the fourth parameter in wp_add_dashboard_widget() is the new configuration function. This function renders a form and handles saving the data to the wp_options table using update_option().
Styling Your Widget for a Professional Look
While the dashboard has its own CSS styles, your widget might need custom styling to improve readability or highlight important information. WordPress provides a built-in method to enqueue stylesheets only on the admin dashboard.
Add the following code to your plugin or theme:
php
function my_dashboard_widget_styles() {
$screen = get_current_screen();
if ( $screen->id === ‘dashboard’ ) {
wp_enqueue_style( ‘my-dashboard-widget-style’, plugin_dir_url( FILE ) . ‘admin-dashboard-style.css’ );
}
}
add_action( ‘admin_enqueue_scripts’, ‘my_dashboard_widget_styles’ );
Then, create a corresponding CSS file (admin-dashboard-style.css) to add your styles:
css
.my-dashboard-widget {
font-family: -apple-system, BlinkMacSystemFont, "Segoe UI", Roboto, Oxygen-Sans, Ubuntu, Cantarell, "Helvetica Neue", sans-serif;
}
.my-dashboard-widget h4 {
margin-bottom: 0.5em;
border-bottom: 1px solid #ccd0d4;
padding-bottom: 0.25em;
}
.my-dashboard-widget ul {
list-style: none;
padding-left: 0;
}
.my-dashboard-widget ul li {
margin-bottom: 0.75em;
padding-left: 0;
}
Strategic Widget Placement and User Control
A common challenge is that new widgets are often added at the bottom of the dashboard, potentially going unnoticed. You can programmatically control your widget’s position by manipulating the global $wp_meta_boxes array.
Furthermore, consider user capabilities. You might want a widget to be visible only to administrators, not to subscribers or editors. You can wrap your widget registration in a conditional check.
php
function my_advanced_dashboard_widget() {
// Check if the current user has administrator capabilities
if ( current_user_can( ‘manage_options’ ) ) {
wp_add_dashboard_widget(
‘admin_only_widget’,
‘Administrator Report’,
‘display_admin_widget’
);
    // Force the widget to the top of the dashboard
    global $wp_meta_boxes;
    $normal_dashboard = $wp_meta_boxes['dashboard']['normal']['core'];
    $my_widget = array( 'admin_only_widget' => $normal_dashboard['admin_only_widget'] );
    unset( $normal_dashboard['admin_only_widget'] );
    $sorted_dashboard = array_merge( $my_widget, $normal_dashboard );
    $wp_meta_boxes['dashboard']['normal']['core'] = $sorted_dashboard;
}
}
add_action( ‘wp_dashboard_setup’, ‘my_advanced_dashboard_widget’ );
This code first checks the user’s capability before adding the widget. Then, it manually moves the widget to the top of the ‘normal’ context array, ensuring it is the first widget the user sees.
Conclusion: Unleashing Customization Potential
The ability to create custom dashboard widgets is an indispensable skill for any WordPress developer or advanced user. It moves beyond simple theme customization into the realm of creating tailored administrative experiences. From displaying key performance indicators and analytics feeds to providing quick links and internal communication tools, the applications are limited only by your imagination.
By following the principles outlined in this guide—using hooks correctly, securing your forms with nonces, sanitizing user input, and applying thoughtful styling—you can build robust, secure, and highly useful tools that make managing a WordPress site more efficient and intuitive. Begin with a simple widget, experiment with dynamic data, and gradually incorporate more advanced features like configuration and targeted user display to truly master WordPress dashboard customization.
