
Blog
Zobacz ten sposób jak podłączyć Make.com do WordPress #automatyzacja #ai #wordpress
In the modern digital landscape, efficiency isn’t just a luxury; it’s a necessity. For WordPress website owners, the constant juggle of content creation, user management, and data handling can consume valuable hours that could be better spent on strategy and growth. This is where the power of automation comes into play, transforming a reactive website into a proactive, self-operating hub.
Imagine your website intelligently responding to user actions, managing data behind the scenes, and seamlessly integrating with your entire toolkit—all without manual intervention. This isn’t a vision of the distant future; it’s an achievable reality today by harnessing the synergy between a powerful automation platform and the world’s most popular content management system.
Unlocking a New Era of Website Automation
At its core, automation is about creating systems that handle repetitive tasks based on predefined triggers and actions. For a WordPress site, this could mean automatically adding new form submissions to your CRM, sending personalized welcome emails to new subscribers, posting content to social media channels, or updating internal databases.
While several tools exist to facilitate this, one platform stands out for its robust capabilities and intuitive design: Make.com. Formerly known as Integromat, Make.com is a visual automation platform that allows you to connect apps and design complex workflows with incredible flexibility. When integrated with WordPress, it unlocks a new dimension of functionality, moving far beyond what standard plugins can accomplish alone.
Why Make.com is a Game-Changer for WordPress Users
You might wonder why you should consider an external automation tool when countless plugins are available. The answer lies in power, flexibility, and centralization.
1. Unmatched Versatility: Make.com isn’t limited to WordPress-specific actions. It acts as a central brain that can connect your site to over a thousand other applications—from Google Sheets and Slack to Mailchimp and OpenAI. This allows you to create workflows that span your entire digital ecosystem.
2. Complex Logic Made Simple: Through its visual interface, you can build scenarios with conditional logic, filters, routers, and data transformers. This means your automations can make intelligent decisions, like only posting blog articles that are tagged with a specific category or sending a notification only if a form submission meets certain criteria.
3. Reducing Plugin Bloat: Relying on a single, powerful automation tool can help you eliminate a handful of single-purpose plugins. This reduces potential conflicts, minimizes security vulnerabilities, and can contribute to a faster, leaner website.
Preparing Your WordPress Site for Integration
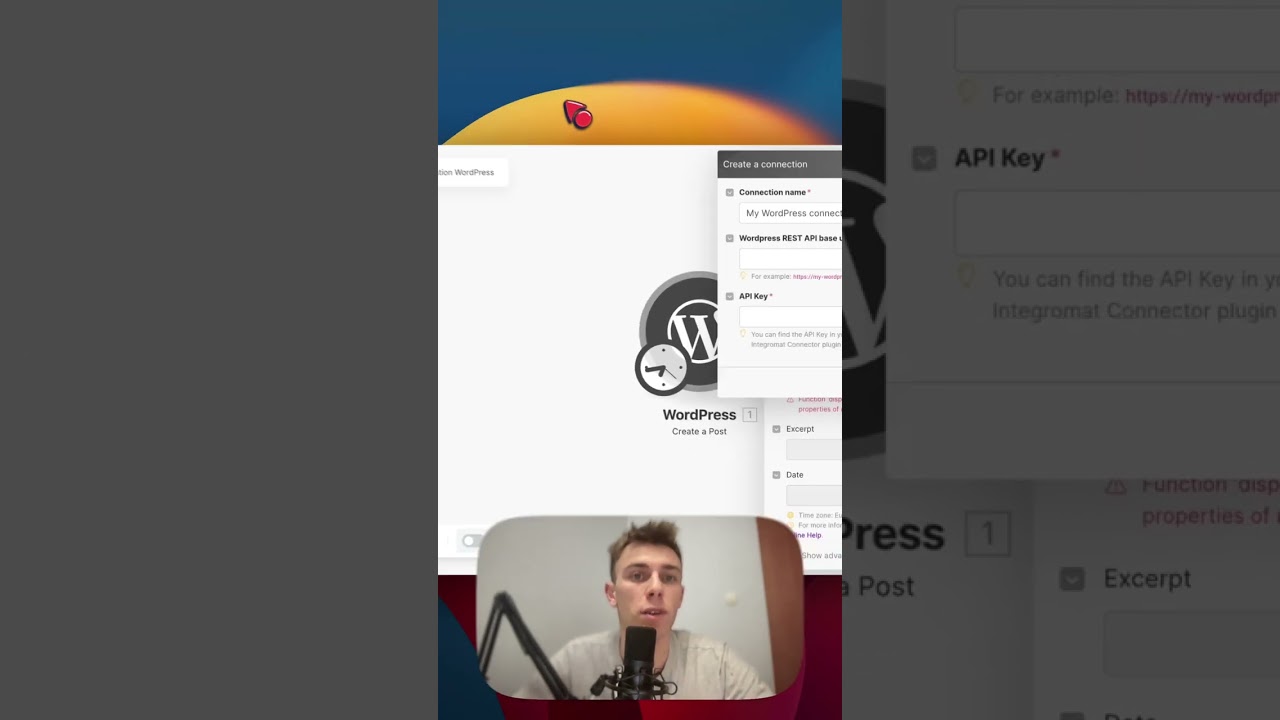
Before diving into building workflows, a small amount of preparation is required on your WordPress site. The key to a secure connection between Make.com and WordPress is the WordPress REST API. This API allows external services to interact with your site’s data in a standardized, secure way.
To leverage this fully, you will likely need to install a dedicated integration plugin. A popular and highly recommended choice is the "WP Webhooks" plugin. This tool extends the capabilities of the native REST API, providing specific triggers (for when something happens on your site) and actions (for when you want something to happen on your site) that Make.com can easily hook into.
Installation is straightforward:
- Navigate to
Plugins > Add Newwithin your WordPress dashboard. - Search for "WP Webhooks" or a similar robust webhooks plugin.
- Install and activate the plugin.
- Explore the settings to understand the available triggers and actions, often providing you with specific URLs (endpoints) that Make.com will use to communicate with your site.
Crafting Your First Automation: A Practical Example
Let’s translate theory into practice with a common use case: automatically creating a new user in your CRM system whenever someone fills out a contact form on your WordPress site.
The Scenario: A visitor submits a "Request a Quote" form. This trigger should initiate an automation that takes their data (name, email, message) and adds them as a new contact in your CRM (like HubSpot or Salesforce).
Step 1: Establish the Connection in Make.com
Create a new scenario in Make.com. The first step is to set up the trigger. You will select WordPress as your app and choose a trigger, likely something like "Watch Webhook Responses" provided by the WP Webhooks plugin. This will generate a unique Webhook URL.
Step 2: Configure the WordPress Trigger
In your WordPress Webhooks plugin settings, find the trigger for "Form submitted" (this will vary based on your form plugin, e.g., Fluent Forms, Gravity Forms). You will paste the unique Webhook URL from Make.com into the plugin’s settings for this trigger. Now, every form submission will send a packet of data to Make.com.
Step 3: Process the Data in Make.com
Once Make.com receives the data from WordPress, you can use a "Data Filter" module to ensure you only proceed with valid submissions. Following this, add your CRM app (e.g., HubSpot) to the scenario. Use an "Create a Contact" action and map the incoming data from the WordPress webhook to the corresponding fields in your CRM (e.g., map name to First Name, email to Email).
Step 4: Test and Activate
Use a test form submission on your live site to trigger the scenario. Make.com will process the data in real-time, allowing you to see each step and verify the data is mapped correctly. Once confirmed, activate your scenario. It will now run automatically for every future form submission.
Exploring Advanced Automation Possibilities
The simple form-to-CRM workflow is just the beginning. The true potential of Make.com and WordPress is realized in more sophisticated scenarios:
- Content Distribution: Automatically share new blog posts to LinkedIn, Twitter, and other social platforms the moment they are published, complete with custom formatting for each network.
- Dynamic User Engagement: When a user completes a purchase, trigger a workflow that adds them to a specific email list in your marketing platform, sends a personalized thank you message via SMS, and creates a task for your follow-up team.
- AI-Powered Content Enhancement: Integrate with OpenAI to automatically generate meta descriptions for your posts, suggest tags based on the content, or even translate excerpts into different languages.
- Internal Database Management: Sync form entries directly to a Google Sheet or an Airtable base for easy team access and analysis, creating a live, updating report.
Best Practices for Sustainable Automation
As you build more automations, keeping them organized and efficient is crucial.
- Start Simple: Begin with a single, high-value task. Master the basics before attempting multi-step, complex scenarios.
- Name Everything Clearly: Use clear names for your scenarios, modules, and data mappings. This will save you immense debugging time later.
- Implement Error Handling: Use Make.com’s built-in error handling routes to catch and notify you of failures, such as an incorrect API key or a down service.
- Monitor Usage: Keep an eye on your Make.com operations count, especially on free or limited plans, to ensure your automations are running efficiently and cost-effectively.
Embracing an Automated Future
Integrating Make.com with WordPress is more than a technical setup; it’s a strategic shift in how you manage your digital presence. It empowers you to build a smarter, more responsive website that works for you around the clock. By delegating repetitive tasks to reliable automations, you free up your most valuable asset—time—to focus on creative endeavors, business development, and crafting the superior user experiences that will truly set your website apart.
The journey toward a fully automated workflow begins with a single trigger. By taking the steps outlined here, you are well on your way to building a more efficient, powerful, and intelligent online platform.

