
Blog
Building ‘Jalapeño Business AI’ — WordPress Install on Subdomain + SSL + AI (in 10 mins)
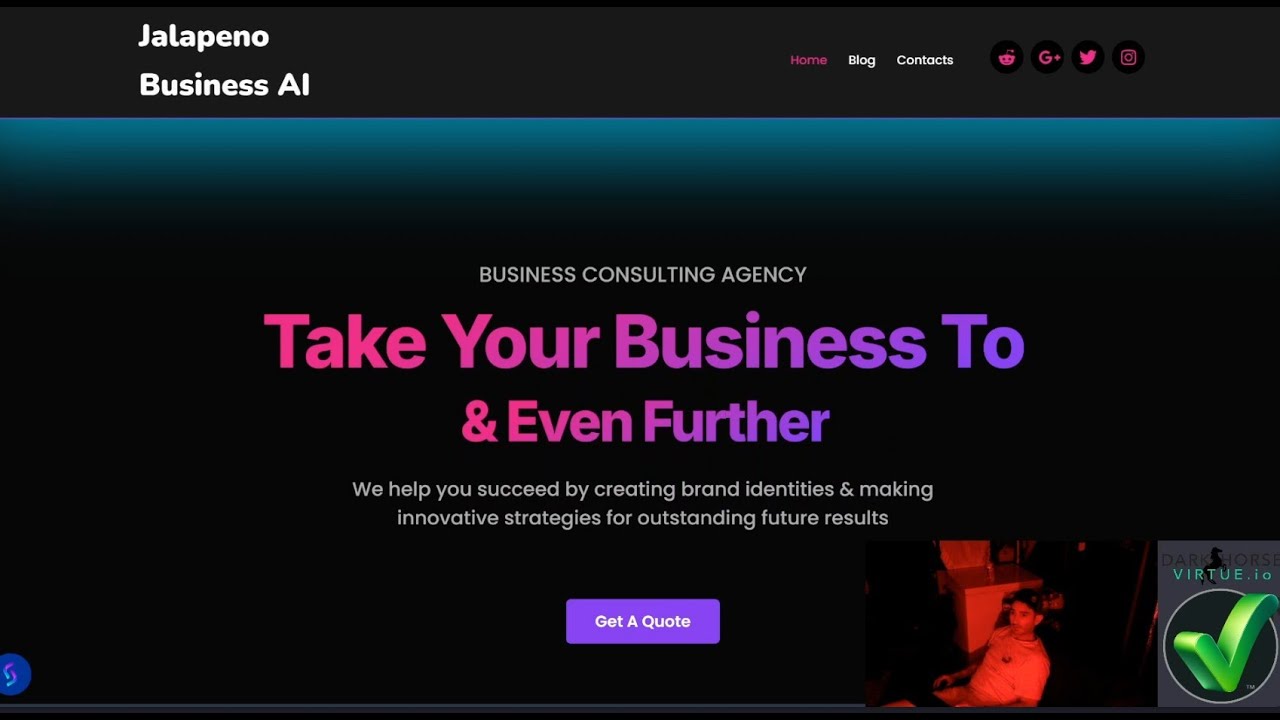
Creating a Scalable Business AI Solution with WordPress: A Step-by-Step Guide
In today’s fast-paced digital landscape, businesses require tools that streamline operations, enhance customer engagement, and drive growth—all without sacrificing time or resources. Building an AI-powered business platform might seem daunting, but with the right approach, you can set up a robust system in under 10 minutes. This guide walks through installing WordPress on a subdomain, securing it with SSL, and integrating AI functionalities to create what we’ll call Jalapeño Business AI.
Why Combine WordPress, SSL, and AI?
Before diving into the technical steps, let’s explore why this trio is a game-changer for modern businesses:
- WordPress: A flexible, user-friendly CMS that powers over 40% of websites globally.
- SSL Certificates: Essential for data encryption, user trust, and SEO rankings.
- AI Integration: Automates tasks, personalizes user experiences, and provides actionable insights.
By hosting your AI tools on a dedicated subdomain (e.g., ai.yourbusiness.com), you keep your main site clutter-free while maintaining scalability and focused functionality.
Step 1: Setting Up a Subdomain for Your AI Platform
A subdomain acts as a separate entity under your primary domain, ideal for testing new tools or hosting specialized services.
How to Create a Subdomain:
- Access Your Hosting Dashboard: Log into your hosting provider (e.g., Bluehost, SiteGround).
- Navigate to the Subdomain Section: Look for options like Domains > Subdomains.
- Name Your Subdomain: Use a concise name like “ai” or “businessai.”
- Configure Settings: Point the subdomain to its root directory (often auto-generated as /public_html/ai).
Most hosting platforms complete this process in under two minutes. Once done, your subdomain will be accessible via ai.yourdomain.com.
Step 2: Installing WordPress on the Subdomain
WordPress’s one-click installers simplify setup, even for non-developers.
Installation Steps:
- Locate the Auto-Installer: Popular tools like Softaculous (found in cPanel) streamline installations.
- Choose Your Subdomain: Select the newly created subdomain from the dropdown menu.
- Configure Core Settings:
- Set an admin username and strong password.
- Input your business email for notifications.
- Complete Installation: Click “Install.” Within seconds, WordPress will be live on your subdomain.
Pro Tip: Opt for a lightweight theme like Astra or GeneratePress to ensure speed and compatibility with AI plugins.
Step 3: Securing Your Subdomain with SSL
An SSL certificate encrypts data transfers, protects user information, and boosts your site’s credibility. Most hosts offer free SSL via Let’s Encrypt.
Activating SSL:
- Access Your Host’s Security Panel: Look for “SSL/TLS” or “Security” settings.
- Select Your Subdomain: Choose the subdomain from the list.
- Enable Auto-SSL: Many providers auto-install certificates—click “Install” or “Enable.”
- Verify Activation: Visit your subdomain URL using https://. A padlock icon should appear in the browser bar.
If issues arise, clear your browser cache or check for DNS propagation delays (up to 48 hours).
Step 4: Integrating AI Functionalities into WordPress
Here’s where Jalapeño Business AI comes to life. AI can handle chatbots, data analysis, content recommendations, and more.
Options for AI Integration:
- Plugins for Beginners:
- AI Engine: Adds chatbots, GPT-3 content generation, and analytics.
- TensorFlow Lite: Deploy machine learning models for image recognition or predictive analysis.
- Custom Solutions for Advanced Users:
- Use APIs like IBM Watson or Google Cloud AI to build tailored tools.
- Embed code snippets into WordPress pages or plugins.
Configuring an AI Chatbot (Example):
- Install the AI Engine plugin from the WordPress repository.
- Link it to your OpenAI API key (create an account at OpenAI.com if needed).
- Customize the chatbot’s behavior, language, and placement on your subdomain.
- Test interactions to ensure it responds accurately to user queries.
Step 5: Optimizing Performance and Security
With your AI tools live, prioritize maintaining speed and safety:
Performance Tips:
- Cache Plugins: Use WP Rocket or W3 Total Cache to reduce load times.
- Image Optimization: Compress media files with ShortPixel or Imagify.
- Minimize Plugins: Avoid bloat by deactivating unused extensions.
Security Best Practices:
- Regular Updates: Keep WordPress core, themes, and plugins updated.
- Firewall Protection: Install Wordfence or Sucuri to block malicious traffic.
- Backup Solutions: Schedule daily backups with UpdraftPlus or BlogVault.
Troubleshooting Common Issues
Even streamlined setups can hit occasional snags:
- SSL Not Activating: Ensure your subdomain’s DNS records point correctly to your host.
- AI Plugin Errors: Verify API keys and check for conflicts with other plugins.
- Slow Load Times: Switch to a dedicated hosting plan if traffic grows.
Final Thoughts: Unleashing the Power of Business AI
By following this guide, you’ve built a secure, scalable AI platform on a WordPress subdomain—all in record time. The Jalapeño Business AI framework isn’t just a technical achievement; it’s a strategic asset. Whether automating customer support, analyzing market trends, or personalizing user journeys, your AI tools can evolve alongside your business.
The digital age rewards agility. With WordPress as your foundation and AI as your engine, you’re equipped to innovate faster, smarter, and with confidence. Now, go forth and automate!
Looking Ahead: Stay tuned for advanced guides on training custom AI models and leveraging predictive analytics for business growth.

